

Plus, the costume wasn't too difficult to make, and I had all the supplies on had already. The plan is to sew together 2 sheets of kraft paper, and then cut a slit down the back to make it easier to put on and take off.
This is how I put it together (although fair warning, I am pretty inept at making my own sewing patterns).

MATERIALS:
- Kraft paper/ lots of paper bags
- (clear) packing tape
- sleeveless shift dress as template
- sewing machine, or more tape
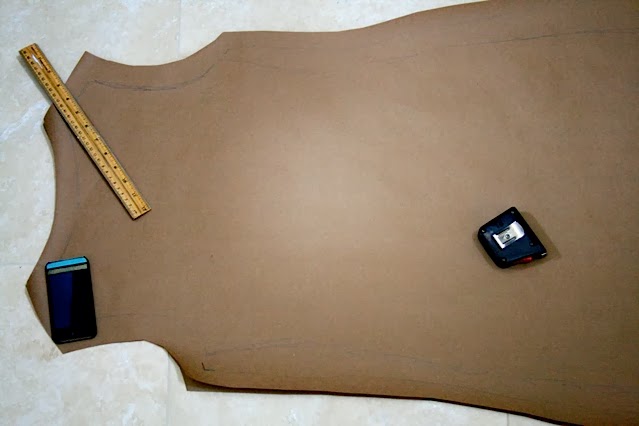
.jpeg)
1. I first traced out my template onto kraft paper. I was originally going to use a tighter dress (the one in the picture above), but ended up using a looser one that worked out much better. Paper has no give, and the extra room was handy when putting the dress on, to keep it from ripping.

2. I doubled the paper over and cut out the template, adding a 1" seam allowance on all sides. I used scalloped scissors at the bottom edge to get the paper bag look, and added a little semi-circle in the center as well.

3. Line the inside of each piece of kraft paper with packing tape (the side with the pencil markings should be the inside). This keeps the paper from ripping too easily, and reinforces it for the sewing machine. (Don't worry if you're going for the super crumply look; it'll still crumple with the tape)
4. Hem the collar and armpits by either folding under the extra paper and taping, or, if you're lazy like me, just cutting it off. The paper's thick enough that you shouldn't get paper cuts.
5. With the right sides of the paper facing each other, sew together the sides and shoulders. I'd err on the side of too big. If you're using a sewing machine, make sure to use a wider stitch. Reinforce the stitches with tape if you think it needs it. Trim the extra paper so you don't have too much paper poking your sides.
6. Cut a slit down the middle of the back, like where a zipper would go. Crumple to your liking, and flip the dress right side out. Be extra careful not to rip the paper! I also folded a crease on each side to give it the boxy paper bag shape.

And voila, you're done! I was a bit hand-wavy with my template and sewing, so the shape is a little lopsided, but I don't think you can really tell. I'm planning on belting it with some twine, and then having my mom tape the back up once I've shimmied into the dress. It's a two-person endeavor, people!
Hope this tutorial kinda maybe made sense! And hopefully it won't be too cold on Halloween, but if it is, I'll just snuggle with my dragon/cat =]
2 comments:
Oh My GOODNESS !! Thank you SO much! This is EXACTLY the costume that I need (desperately want) for our parish Halloween kiddo party.
This DIY Paper Bag costume is adorable and so creative! It’s amazing how versatile brown paper
can be — from packaging to imaginative costumes like this one. The way you've styled and customized the paper gives it such character and charm. At Sky Print and Enterprise, we work with custom brown paper designs for packaging, but seeing it used for something fun and wearable is such a refreshing twist. Love the eco-friendly creativity here!
Post a Comment